4-at-a-time Flying Geese
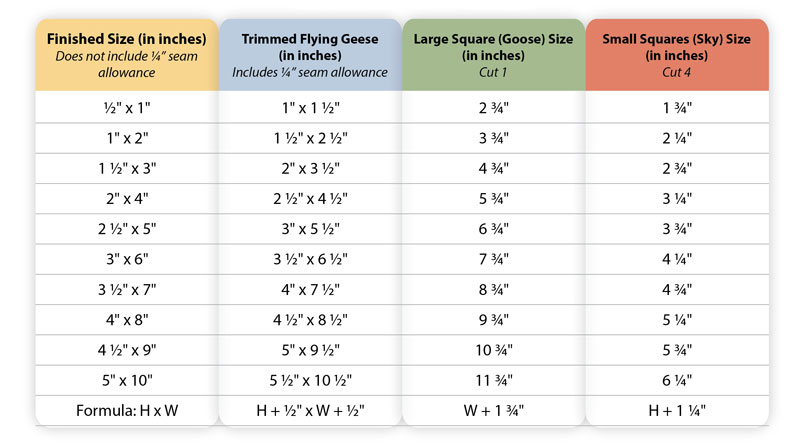
To get started we need to find out how big to cut your squares to create Flying Geese, 4 at a time. The method below will provide an oversized Flying geese unit so that you can trim to the perfect size:

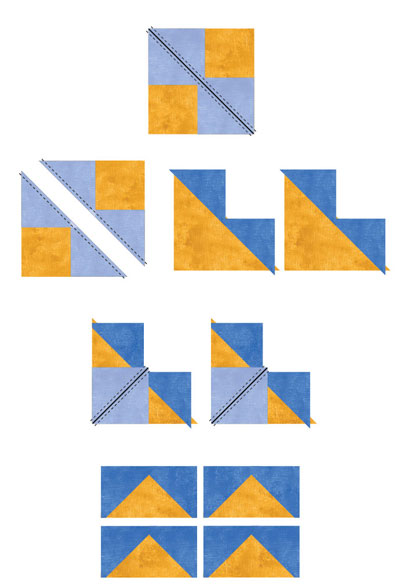
- On the wrong side of the 4 small squares, mark diagonal lines from one corner to the opposite corner.
- Place 2 small squares on opposite corners of the larger square, right sides together (RST), as shown.
- Sew scan ¼” on both sides of the drawn line.
- Cut apart on drawn line, press seams toward small squares.
- Arrange a small square on the corner of each of the newly created units.
- Sew scan ¼” on both sides of the drawn line.
- Cut apart on drawn line, press seams toward small square.
- Trim to the size listed in the second column “Trimmed Flying Geese Unit Size” (Be sure there is at least ¼” of fabric between the tip of the flying geese triangle and the edge of the block.)

